Introduction

In the dynamic realm of WordPress site management, mastering the art of removing themes is an invaluable skill. Whether you're decluttering your dashboard, enhancing security, or making way for a fresh design, understanding the process of deleting themes is crucial. This comprehensive guide will walk you through the step-by-step procedure, offering insights into why it's essential and providing tips for a seamless experience.

How To Delete a WordPress Theme?

Before delving into the deletion process, it's essential to grasp the significance of removing themes. Outdated or unused themes not only clutter your WordPress dashboard but also pose security risks and can hinder your site's performance. Every theme installed on your site represents a potential vulnerability, making regular housekeeping a fundamental aspect of WordPress site maintenance. By deleting unnecessary themes, you not only streamline your site's backend but also reduce the likelihood of security breaches and optimize your site's speed and performance.

Step-by-Step Guide :
Access Your WordPress Dashboard: Begin by logging in to your WordPress admin panel using your credentials.

Navigate to Appearance > Themes: Once logged in, locate the "Appearance" option in the sidebar menu and click on it. From the dropdown menu that appears, select "Themes."

{{brizy_dc_image_alt imageSrc=

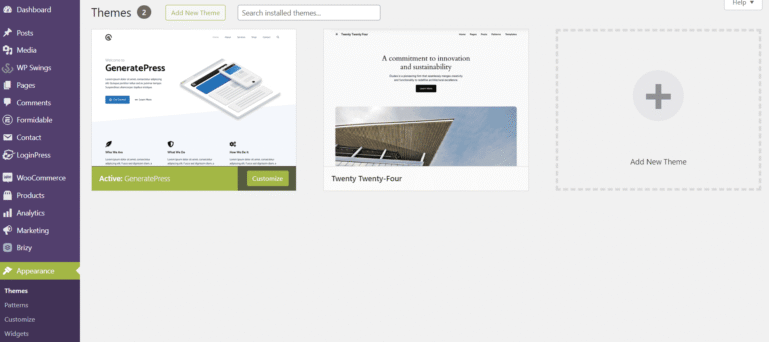
Identify the Theme to Delete: You'll be directed to the Themes page, where you'll see a list of all the themes currently installed on your site. Scroll through the list and identify the theme you wish to delete. Ensure that the theme you intend to delete is not currently active.

Delete the Theme: Hover your cursor over the thumbnail image of the theme you want to remove. A series of options will appear, including "Theme Details." Click on "Theme Details" to proceed.

{{brizy_dc_image_alt imageSrc=

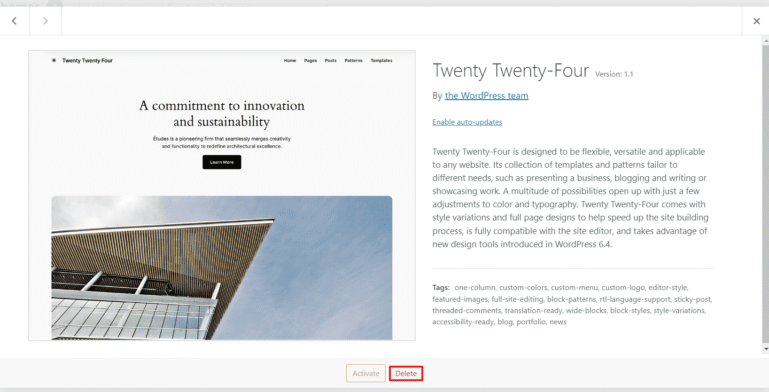
Confirm Deletion: A pop-up window will appear, displaying detailed information about the theme. In the bottom-right corner of this window, you'll find the "Delete" button. Click on it to initiate the deletion process.

Verify Deletion: WordPress will prompt you to confirm your action. This serves as a precautionary measure to prevent accidental deletions. Review the confirmation message carefully, ensuring that you're deleting the correct theme. Once you're certain, click on "OK" to confirm and proceed with the deletion.

Check for Deactivation: After completing the deletion process, return to the Themes page to verify that the theme has been successfully removed. You should no longer see the deleted theme listed among your installed themes.

Tips and Considerations

Keep at Least One Active Theme: It's advisable to always have at least one active theme on your site to prevent potential issues. In the event of a problem with your current theme, having an alternative can ensure that your site remains accessible.

Create Backups: Before deleting any theme, especially if it's currently active, consider creating a backup of your site. This precautionary measure can safeguard your content and settings, allowing you to restore them if needed.

Regular Maintenance: Incorporate theme deletion into your routine site maintenance tasks. Periodically review your installed themes and remove any that are no longer in use. This practice not only keeps your dashboard organized but also contributes to a more efficient and secure WordPress site.

Conclusion

Mastering the process of deleting WordPress themes is an essential skill for every WordPress user. By following the step-by-step guide outlined in this comprehensive article and adhering to the provided tips and considerations, you can effectively streamline your site, enhance security, and optimize performance. Take control of your WordPress dashboard today and enjoy a more efficient and secure site management experience!